
Mastering the technique of tying shoes is a crucial skill that many of us learn during our formative years and continue to utilize in our daily routines. Whether you’re a caregiver instructing a child in their initial attempts at lacing up their sneakers or an adult seeking a quick review of the most effective and reliable method for securing your shoelaces, the ability to tie shoes proficiently holds significant importance.
Not only does it ensure that your shoes stay snugly in place, preventing discomfort and potential accidents, but it also adds a touch of neatness and professionalism to your overall appearance. We will look at numerous shoe-tying procedures and approaches in this tutorial to accommodate varying tastes and shoe designs.

We will explore various approaches to tying shoes, ranging from the traditional “Loosely” technique to more advanced methods such as the “Bar & Diagonal.” Through detailed, easy-to-follow instructions and accompanying visuals, we aim to assist you in building a solid understanding of shoe tying. Prepare to enhance your shoe-tying skills and consistently achieve impeccable knots!
1. Loosely
In this instructional, we will concentrate on a technique referred to as “loosely tying shoes,” as there are multiple approaches to tying shoelaces. This particular method ensures a snug and cozy fit, enabling effortless modifications and detachment. By adhering to the subsequent steps provided, you can effortlessly and stylishly tie your shoes.
Step 1: Prepare the Laces
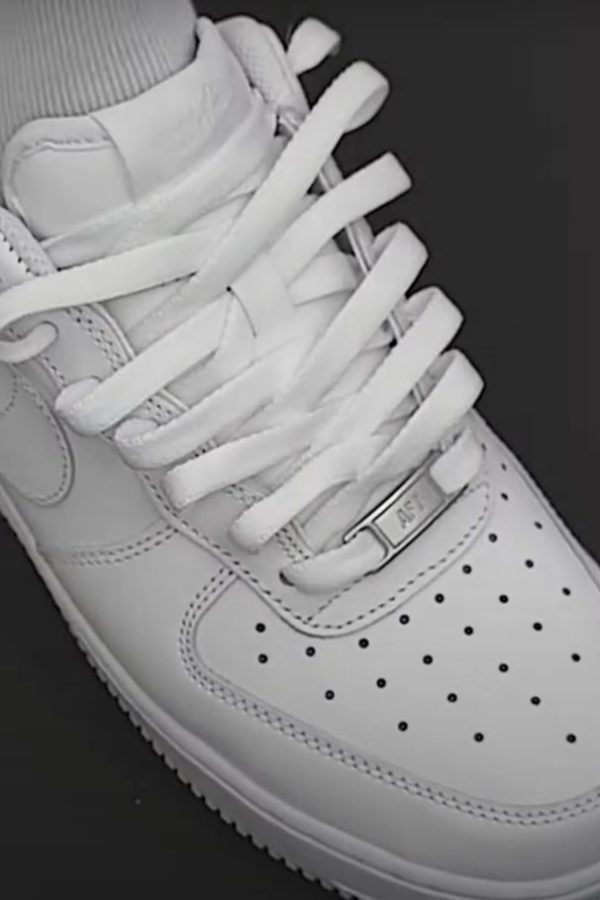
To begin, place a metal tag or any small object in the middle of the lace. This tag will help in maintaining the lace’s position as you tie your shoes. Ensure that both ends of the lace are even in length, allowing for symmetrical tying.
Step 2: Thread the First Two Eyelets
Take the lace ends and thread them through the first two eyelets of your shoe, starting from the bottom. This will create a foundation for the subsequent steps.
Step 3: Cross the Laces
Begin by threading the lace through the initial eyelet on the left side and crossing it over to the adjacent eyelet on the right side. Likewise, thread the lace through the first eyelet on the right side & cross it over to the neighboring eyelet on the left side. This interweaving technique aids in forming a firm and well-balanced knot.
Step 4: Limit the Lace
Using your finger, apply light pressure to limit the lace near the eyelets. This step ensures that the laces remain in place as you continue tying the shoe.
Step 5: Continue the Crisscross Pattern
Repeat the crisscross pattern by taking the lace in the second eyelet on the left side and bringing it over to the third eyelet on the right side. The second eyelet on the right side’s lace should also be brought across to the third eyelet on the left side. With your finger, apply the same amount of pressure on the laces.
Step 6: Progress to the Final Eyelets
Continue the crisscross pattern, advancing from one set of eyelets to the next until you reach the final eyelets near the top of the shoe. Make sure the laces are evenly tensioned as you move up.
Step 7: Alter the Direction
When reaching the last set of eyelets, deviate from the usual approach of threading through the top portion. Instead, pass the laces through the bottom of the eyelets, starting from the inner side and emerging on the outer side, for both sides of the shoe. This unique modification imparts a distinct flair to your method of tying shoes.
Step 8: Adjust and Secure
Once the laces are threaded through the bottom of the final eyelets, gently pull the laces to adjust the fit of your shoes. Ensure that the tension is comfortable and evenly distributed across the foot. Once you achieve the desired fit, tie a standard knot or a bow to secure the laces in place.
Watch more: How To Measure Shoe Width in this post
2. Diamond

One popular method is the diamond method, which not only ensures a secure knot but also creates an attractive diamond-shaped pattern on the laces. We will demonstrate how to tie your shoes using the diamond method in detail in this article.
Step 1: Prepare the Laces
To begin, ensure that the shoelaces are of equal length. Starting from the two bottom opposite-facing holes, insert each end of the shoelace from the inside. It’s crucial to maintain an equal length on both sides to achieve a symmetrical appearance.
Step 2: Cross the Laces
Bring the thread diagonally across to the third eyelet on the right side, starting from the final eyelet on the left side. This step creates the foundation for the diamond pattern.
Step 3: Weave the Left Lace
With the left lace now positioned on the right side, take it under the shoelace that is adjacent to the previous eyelet. This motion effectively weaves the lace under the existing laces.
Step 4: Weave the Right Lace
Similarly, take the right lace and bring it under the adjacent shoelace on the left side. By weaving the laces in this manner, you gradually build the diamond pattern as you progress.
Step 5: Continue Weaving
Repeat steps 3 and 4 alternately until you reach the final eyelets. With each weave, the diamond pattern becomes more defined, giving your shoelaces a unique and eye-catching appearance.
Step 6: Complete the Knot
Once you have reached the final eyelets, create a standard knot by crossing the laces over each other and pulling them tightly. Ensure that the knot is secure enough to hold the shoe in place during regular activities.
Step 7: Adjust the Laces
After tying the knot, take a moment to adjust the laces for optimal comfort. Make sure the shoe fits your foot tightly and that the strain is spread evenly. By rearranging the diamond pattern to your choice, you may also alter how the laces look.
3. Big’x’ & Bar

While there are numerous methods to tie shoes, another popular technique is the “Big ‘x’ & Bar” method. This method involves a specific sequence of steps to ensure a secure and neat knot.
Step 1: Place one end of the shoelace through the second top left hole
To initiate the process of fastening your shoelaces, commence by inserting one end of the lace through the second hole located on the upper left side of your shoe. This serves as the initial step in the lacing procedure.
Step 2: Thread the right end of the shoelace into the first left hole from the top
Take the right end of the shoelace & thread it into the first left hole from the top. This creates a diagonal line across the shoe, forming the first part of the “big ‘x.'”
Step 3: Put the same string into the first right eyelet from the bottom
Now, take the same end of the shoelace and insert it into the first right eyelet from the bottom. This step helps secure the shoelace and prevents it from coming loose during the tying process.
Step 4: Put the same string into the second right eyelet from the bottom
Continuing with the same end of the shoelace, insert it into the second right eyelet from the bottom. This step adds another level of security to the knot.
Step 5: Put the same string into the first right eyelet from the top
Take the same end of the shoelace and insert it into the first right eyelet from the top. This completes the “big ‘x'” formation and prepares for the next steps of the lacing process.
Step 6: Put the same string into the first left eyelet from the bottom
Now, take the same end of the shoelace and insert it into the first left eyelet from the bottom. This step ensures that the shoelace remains taut and well-positioned.
Step 7: Put the same string into the second left eyelet from the bottom
Continuing with the same end of the shoelace, insert it into the second left eyelet from the bottom. This step further reinforces the knot and contributes to its overall stability.
Step 8: Put the same string into the third left eyelet from the bottom
Take the same end of the shoelace and insert it into the third left eyelet from the bottom. This step completes the initial lacing pattern and prepares for the subsequent steps.
Step 9: Using the left end, thread it in the opposite hole in a straight line
Switch to the left end of the shoelace and thread it through the hole directly opposite to it in a straight line. This creates a bar-like structure across the shoe, adding strength and symmetry to the knot.
Step 10: Insert the end of the shoelace into the next right eyelet
Take the left end of the shoelace & insert it into the next right eyelet. This step continues the lacing pattern, ensuring that the shoelace remains secure and properly fastened.
Step 11: Keep going until you reach the final eyelets
Repeat the previous step, alternately threading the shoelace through the remaining eyelets until you reach the final eyelets at the top of the shoe. This process ensures that the shoelace is securely woven through all the holes.
Step 12: Pass the same rope again through the second right eyelet from the top
After reaching the final eyelets, go back to the second right eyelet from the top and pass the same end of the shoelace through it again. This final step reinforces the knot and provides an extra layer of security.
Read more: How To Clean Suede Shoes in here
4. Bar Lacing

Bar lacing is a popular method known for its clean and secure finish. In this article, we’ll show you how to tie shoes using the bar lacing method step-by-step. By following these steps, you’ll be able to tie your shoes in a way that keeps them snugly fastened throughout the day.
Step 1: Positioning the Laces
To begin bar lacing, first, place a metal tag or any other suitable marker in the middle of the shoelace. This will help you identify the midpoint easily. Take each end of the shoelace and insert it downward through one of the bottom two eyelets of your shoe. Ensure that the lace ends are of equal length.
Step 2: Creating the First Bar
After inserting the lace ends, move the left lace underneath the shoe and let it emerge from the second eyelet on the left side. Similarly, take the right lace and guide it underneath the shoe so that it pops out of the third eyelet on the right side. The laces should now appear diagonally on the sides of the shoe, with a straight bar running across the bottom.
Step 3: Crossing Over
Proceed by crossing the lace on the left side diagonally over to the right side of the shoe, ensuring it goes over the straight bar. Then, insert the left lace in a downward direction through the second eyelet on the right side. This action forms a horizontal loop positioned above the bar.
Step 4: Cross and Insert
The right lace should now be crossed over to the left side of the shoe, crossing over the horizontal loop you made before. Insert the right lace downward through the third eyelet on the left side. This completes the second loop, mirroring the first one.
Step 5: Repeat and Finish
Continue repeating steps 3 and 4 alternately until you reach the top of the shoe, creating a series of interlocking loops. Ensure that each loop is snug but not too tight, allowing for comfortable movement and flexibility. Once you reach the last pair of eyelets, tie a regular bow knot to secure the laces in place.
5. Zig Zag

Learning how to tie shoes is a fundamental ability that many individuals acquire during their early years. You might be surprised to learn that there are several ways to lace shoes. Among these, the zig-zag lacing technique stands out as a favored approach. It not only guarantees a snug fit but also imparts a fashionable flair to your sneakers.
Step 1: Proper Lace Placement
To start, it is crucial to confirm the proper insertion of the lace into the eyelets of your sneakers. Instead of the common practice of going over the top of the eyelets, you should insert the lace from the bottom. This method enables you to achieve the desired zig-zag pattern while advancing through the lacing procedure.
Step 2: Starting the Zig Zag Pattern
Now that the laces are properly placed start by taking the lace from the outside of the sneaker and insert it through the next eyelet up and across towards the opposite side. Repeat this step with the other lace, starting from the outside and going through the next eyelet up and across to the opposite side. Alternate between the two laces as you continue this pattern, going through each successive eyelet on both sides of the shoe.
Step 3: Creating the Loops
Once you have reached the final eyelets, it’s time to create the loops that will secure your shoelaces. To do this, insert the right lace through the loop created on the left side. This will form a tight, secure knot that holds the laces in place. It’s important to note that the loop should be created by passing the lace underneath the existing lace rather than over the top to maintain the zig-zag pattern.
Step 4: Finishing Touches
Continue creating loops with the remaining eyelets until you reach the top of your shoe. To guarantee a secure fit, adjust the laces’ tension as necessary, being careful to avoid making them either too tight or too loose. Once you have completed the zig-zag lacing pattern and achieved the desired fit, tie a final knot at the top to secure the laces in place.
6. Factory Knot

Factory Knot presents an effective and dependable method. In this post, we’ll give you a step-by-step tutorial on how to tie shoes with the Factory Knot method, ensuring consistently neat and secure results.
Step 1: Preparing the Laces
To begin, place a metal tag on the lace, ensuring it is positioned in the middle. This will act as a visual marker for the subsequent steps. Next, thread the laces through the first two eyelets, starting from the bottom and working your way up.
Step 2: Initial Cross
Take the lace that comes out of the first eyelet on the left side and insert it into the second eyelet on the right side. This will create a diagonal cross where the laces intersect.
Step 3: Second Cross
Similar to the previous step, take the lace that comes out of the first eyelet on the left side & insert it into the second eyelet on the right side, mirroring the diagonal cross created earlier. This forms a secure foundation for the knot.
Step 4: Tightening the Laces
At this stage, use your fingers to hold and limit the tension on the laces. It is crucial to ensure that the laces are taut but not overly tight, allowing for comfortable movement while keeping the shoes securely fastened.
Step 5: Continuing the Crosses
Proceed with the same lacing technique explained in steps 2 and 3, consistently crossing the laces. Repeat this procedure until you reach the last set of eyelets, progressively forming the knot.
Step 6: Transition to Underneath
Next, modify the lacing method by passing the laces through the underside of the eyelets, starting from the interior of the shoe and extending outward. This alteration enhances both the stability and aesthetic appearance of the knot.
Step 7: Finger Wrap
To further reinforce the knot and prevent it from unraveling, wrap the laces around the first finger of your lower hand. The number of wraps can vary based on personal preference, but two or three wraps generally suffice for most shoe sizes.
Step 8: Cross and Pinch
Cross the loose ends of the laces over the wrap you created in the previous step, forming an X-shape. Pinch the crossed ends firmly under your thumb, ensuring a secure grip.
Step 9: Loop Creation
Working your fingers out of the wrap, carefully manipulate the laces to create a loop on each side of the shoe. This loop will serve as the anchor for the final step of the tying process.
Step 10: Finishing Touch
Fold the excess laces over the top of the shoe, directing them toward the eyelets. Thread the folded end of the laces through the corresponding eyelets, starting from the bottom and working your way up. This final maneuver completes the Factory Knot, providing a tidy appearance while securely fastening your shoes.
7. Star

Discover the perfect way to add a unique twist to your shoe lacing style with star lacing, also known as pentagram lacing. This guide provides step-by-step instructions, along with a helpful photo guide and video, to help you master this eye-catching technique in no time. Transform your shoes and make a bold statement with star lacing.
Step 1: Starting the Lacing
To begin star lacing, take your lace and thread it into the second eyelet from the top on the right-hand side of the shoe, with the shoe toe facing you. Ensure that you thread the lace through the eyelet from underneath. This step sets the foundation for the rest of the lacing pattern.
Step 2: Creating the First Bar
Next, bring the lace over the sneaker tongue to the left-hand side and feed it down into the second eyelet on that side, this time from above. This creates a crisp bar-like effect. Verify that your result matches the illustration to ensure accuracy.
Step 3: Continuing the Lacing Pattern
Take the lace and thread it up and through the fourth eyelet from the top on the left-hand side. It is crucial to remember that the eyelet should be the fourth, not the third, and the lace should show through from below. The second component of the pattern is introduced at this stage.
Step 4: Creating the Second Bar
Now, bring the lace over to the right-hand side and feed it down into the fourth eyelet from the top on that side. This step mirrors the first bar and adds depth to the lacing pattern.
Step 5: Forming the Base of the Star
Thread the lace up and through the very bottom eyelet on the right-hand side, ensuring it comes up through the eyelet from underneath. Take care to hide the excess lace by tucking it behind the canvas side of the shoe. This step forms the base of the star pattern.
Step 6: Building the Star
Bring the lace back over to the left-hand side and thread it into the fourth eyelet from the top, from above. This eyelet now accommodates two sections of the lace, as shown in the illustration. Each step is crucial in achieving the desired star pattern.
Step 7: Completing the Star Arms
Next, bring the lace down and up into the very bottom eyelet on the left-hand side, ensuring it comes up through the eyelet from underneath. Double-check the pattern to ensure it is symmetrical and accurately resembles the star shape.
Step 8: Adding Detail to the Star
Now, bring the lace over to the fourth eyelet from the top on the right-hand side and feed it into it from above. At this stage, there should already be another lace in the eyelet, and the arms of the star pattern will begin to take shape.
Step 9: Securing the Lacing
Bring the lace down and up over the sneaker tongue, making sure to thread it under the top cross-section of the star pattern. Then, hook it over the bar anchor created earlier. Refer to the illustration to ensure your result matches.
Step 10: Finalizing the Pattern
Continue by bringing the lace over, then under the arms of the star pattern, following the illustration for guidance. Pause at this stage to review the pattern and make any necessary adjustments. If needed, refer back to the video tutorial provided earlier.
Step 11: Securing the Lace
Thread the lace down into the very bottom eyelet on the left-hand side from above, ensuring it sits underneath the entire star pattern. The lace should feed out to the very top of the shoe tongue, creating a clean finish.
Step 12: Completing the Lacing
Finally, feed the lace into the very top eyelet on the left-hand side from underneath. Bring it across and down into the very top eyelet on the right-hand side to create a crisp bar-like effect. This step gives the pattern a polished appearance and completes the star lacing.
8. Bar & Diagonal

Bar and diagonal methods offer a secure and aesthetically pleasing knot. This comprehensive guide will delve into the step-by-step instructions to master the art of tying shoes using the bar and diagonal technique.
Step 1: Starting Position
To begin, gather your shoelaces and ensure they are of equal length. Place one end of the shoelace through the second top right hole, from the outside of the shoe towards the inside. Additionally, from the outside to the inside, take the other end of the shoelace and thread it through the bottom’s left hole. With the laces, this shapes a cross.
Step 2: Diagonal Cross
Next, take the end of the shoelace that is on the left side and thread it diagonally across the shoe, inserting it into the opposite hole on the right side from the top. This diagonal movement helps create a firm foundation for the knot.
Step 3: Bar Creation
Now, pick up the end of the shoelace on the right side and insert it into the next left hole, starting from the top and going towards the inside of the shoe. This will create a horizontal “bar” shape, crossing over the diagonal lace from the previous step. The bar helps reinforce the integrity of the knot.
Step 4: Second Diagonal Cross
Taking the end of the shoelace on the left side again, thread it diagonally across the shoe in the opposite direction of the initial diagonal, inserting it into the next right hole from the top. This completes the second diagonal cross, which further strengthens the knot.
Step 5: Loop Repetition
To finish tying your shoe using the bar and diagonal technique, repeat steps 3 and 4 for the remaining holes, alternating between creating bars and diagonal crosses until you reach the top of the shoe. Each repetition ensures a secure and balanced knot.
Conclusion
In conclusion, mastering the art of tying shoes is a fundamental skill that plays a significant role in our daily lives. Despite its simplicity, this essential task encompasses various techniques and methods, each tailored to different shoe types and personal preferences.
Even though it may seem little, learning how to tie shoes promotes independence and self-sufficiency, especially for young children just starting their path of growth and development. Moreover, these techniques transcend age and remain invaluable in our adult lives, ensuring comfort, security, and a polished appearance.
Whether it be for athletic endeavors, formal occasions, or everyday wear, the art of tying shoes is a timeless skill that deserves our attention and appreciation. So, let us embrace the laces, loops, and knots and master the art of tying shoes to step confidently into a world of endless possibilities.
FAQs
How tight should I tie my shoelaces?
It is important to ensure that shoelaces are fastened adequately to keep your shoes snugly on your feet, striking a balance between comfort and avoiding any issues related to circulation or discomfort.
How long should my shoelaces be?
The length of shoelaces can vary depending on the type of shoe and personal preference. As a general guideline, shoelaces for sneakers or casual shoes are typically between 27 and 36 inches long.
How do I prevent my shoelaces from coming untied?
To prevent shoelaces from coming untied, make sure you tie them properly using a secure knot. Additionally, you can double-knot the laces or use lace anchors to keep them in place.
What should I do if my shoelaces keep getting tangled?
If your shoelaces frequently get tangled, try using a different tying method, such as the Ian knot, which is a quick and tangle-free method of tying shoelaces.
Can I use the same method to tie shoelaces for different types of shoes?
Yes, the basic method of tying shoelaces remains the same for most types of shoes. However, some specialized shoes, like hiking boots or dress shoes, may have unique lacing systems or methods. It’s best to follow the specific instructions or recommendations for those types of shoes.
How often should I replace my shoelaces?
Shoelaces can wear out over time due to regular use. If your shoelaces become frayed, lose their elasticity, or are difficult to tie securely, it’s a good idea to replace them.
Can I wash my shoelaces?
Certainly! Shoelaces can be cleaned by following a simple process. Firstly, detach them from your shoes and put them inside a mesh laundry bag or pillowcase to safeguard them while washing. Opt for a gentle cycle and a mild detergent if using a machine, or hand wash them carefully. Afterward, allow them to air dry completely.
Are there alternative methods for securing shoes without shoelaces?
Yes, there are alternative methods for securing shoes without shoelaces. Some shoes feature Velcro straps, elastic bands, or slip-on designs that eliminate the need for traditional shoelaces.